Wednesday, January 29, 2014

Churn up the volume!

 Ok, I'm going to apologize for that terrible pun, but I really couldn't help myself! I've been working on a churn dash baby quilt, and as I was picking out fabrics, I knew one of them might be too low volume (meaning too much white for contrast with the rest of the block elements). Can you pick out the offending block?

One of these blocks is not like the other...

The fabric was pretty cute before it was cut - strawberries, birds, flowers.  Alas, there was too much white. If I had chosen a bright pink solid for the contrasting fabric of the churn dash, this probably would have worked.  For this particular quilt, it was important to me to have the white dashes standing out as negative space among the prints.  Here she is up close:

I didn't even get to sewing all the elements together before realizing that it wouldn't work!

 It's interesting how the quilters came up with block patterns in the olden days.  One of the chores back in the day was to churn butter using something that looked like the churn dash below.  You can see how these quilters took elements from their every day life and made some beauty out of them.  Pretty inspiring!


 In this quilt, I'm working from 8 inch churn dash blocks all the way down to wee 3 inch blocks.  This is part of the precise piecing section of the Penny Sampler class. I've done one 8 inch block, shown below and the rest are 6 inches.  Once I get the teeny weenys done, I'll let you know how it goes! This is definitely a work in progress!


8 inch block

6 inches


I replaced the low volume pink blocks with two of these - I think it works better. And how can you not love hedgies and foxes?

Friday, January 24, 2014

I'm dreaming of spring...

 It's pretty cold here in New England, and we've come to that point in the mid-winter where our thoughts turn to flowers, birds and little shoots of baby plants peeking through the snow.  Seed companies know this, and we've been getting loads of catalogs.  By the end of the winter, I'll have planned a small organic farm which may or may not fit in our 4x8 plot in our postage-stamp backyard!  For now, my fantasy farm will live on my design wall.  These blocks are part of the Penny Sampler E-Book from Rachel Hauser of Stitched in Color.  Her classes are so clear, incredibly thorough and fun, I totally can recommend them! She's starting a Color Intensive Class soon, and it looks like another winner!


Anyone fancy a hike in the woods - without snowshoes or cross country skis?


 Here are some closeups of the blocks - I used freezer paper applique for everything except the flowers - those were sew-and-turn. I may pick the flowers out and do them again, since the circles are not perfect.  They are charming in their imperfection, but I can't decide if they are distracting or not.

Blue Flower
Pink Flower
 For the birds, I got to break out my embroidery hoop and hand-embellish the feathers on the tail and the eyes. 

Dilly Bird
Little Bird

Vines

Tuesday, January 21, 2014

And NOW I know why designer bags are so darn expensive!

 So, I thought I'd take a little break from quilting to whip up a few 'simple' tote bags, just to keep things interesting...never did I think it would take me three whole days to make these guys! I made the Piece O'Cake tote from Patchwork, Please!


 Perhaps I underestimated the time it would take to make these projects, but as a result I have developed much respect for the people who assemble these bags for a living.   As for this project, there's this great drawstring top, and inner lining that protects everything.


There's a running shoe peeking out of the drawstring top!

I've taken this bag to the gym, since I had to do my run indoors today - it's 11 degrees F!  I took it to the Boston Auto Show. Our Civic is elderly, and needs a replacement soon!  It stowed not just my winter coat, but my two sons AND my husband's. It saved us 9 dollars at the coat check. Checking one bag is cheaper than 4 coats! Sneaky! It has a box pleat on each side (I think that may be the term), and it is deceptively roomy.


I also took it to a synagogue committee meeting where it just sat there and looked pretty. I took it to work today - I teach at an after school, and it held all my teaching stuff, and my winter boots, as 6-11 inches of snow are predicted for this afternoon into tonight! No school tomorrow means more sewing time for me!


I made two at once, one for me, and one for my mother in law who LOVES hippos! Actually, she's a fan of the Sandra Boyton classic book: Hippos Go Beserk!


Here it is on the inside - very cute fabric, but I think the linen calms down the quirkyness of it all, but not TOO much.  Just enough to make it respectable for a trip to the farmer's market or the library!

Tuesday, January 14, 2014

Roundup: Audio to Sew by

I always like to have something playing in my sewing room while I sew, depending on the project it may be just some background music, or if I'm doing something that doesn't require too much concentration, I may listen to a podcast, or audio book.  Here are some of my favorites:

Wait Wait...Don't Tell Me!: NPR's news quiz show.  Very funny and any place where you can find PJ O'Rourke, Mo Rocca and Paula Poundstone joking around about the news, is a place I like to be! Also, the host, Peter Sagal is a quick wit, and also a seasoned runner (running is another hobby of mine).  If you read Runner's World, he writes a not-to-miss column!

Craft Lit: An audio book with benefits!  Heather Ordover holds your hands through the classics. She was a high school English teacher, and really knows her stuff.  She starts her podcast with a bit of crafty talk (usually knitting, zentangling, and other fun stuff) and then moves on to introducing the chapter.  She has amazing readers perform the books (I'm currently on Age of Innocence as read by Brenda Dayne, and it's really engaging).

Audible: This is a place for audiobooks. Anything read by Brenda Dayne, David Hyde Pierce or Ehren Ziegler is worth a listen as they are very talented voice performers.  

Audio books from your local library: Most libraries will have audio books you can check out on mp3 players or CD's.  I am lucky to be part of the Minuteman Library Network, so I can request books/DVDs/CDs and they will deliver them to my local branch libraryThe Phantom Tollbooth read by David Hyde Pierce (Niles Crane from Frasier) is a family favorite! (I could do a whole post on children's audio books and graphic novels, but that's for another time!)

Pandora: When you don't want to think about your music too much. It's an internet radio that lets you add in your favorite musician, and they'll play music like that artist.  You can tweak it by giving certain songs thumbs up or down. 


What do you listen to while you sew?

Please note that I'm not affiliated with any of these companies (although I did meet Heather Ordover of Craft Lit at the Maryland Wool and Sheep Festival a few years back, and she was truly lovely!) In the interest of transparency, the only affiliate link is the amazon link to the Phantom Tollbooth CD.

Sunday, January 12, 2014

Neighborhood Development Project

So. many. wee. pieces.  I had to arrange them on post-its to keep them organized, luckily the assembly instructions were pretty clear!


Once they are assembled, they look a little something like this:


I had to keep my wits about me during construction, as one false move produced a green building with the windows the wrong way round!


And then comes the background in Kona Eggshell and Snow:


Add the roofs (sew and turn applique) and the little village is complete!


This Penny Sampler block will join its friends on the design wall.


Friday, January 10, 2014

Tutorial: Cheater Hanging Sleeve

 I love to sew, but I'm not a huge fan of hand stitching (yet! I probably just need to get more comfortable with a needle and thread). At any rate, I finished my Dogwood Blossom Wallhanging, and I found a cheater way to install a hanging sleeve behind my quilt as I put on the binding.  I'm sure I'm not the first one to do it this way, but since I just winged it on my own, I took pictures as I went, and I thought I'd share! I hope you enjoy!

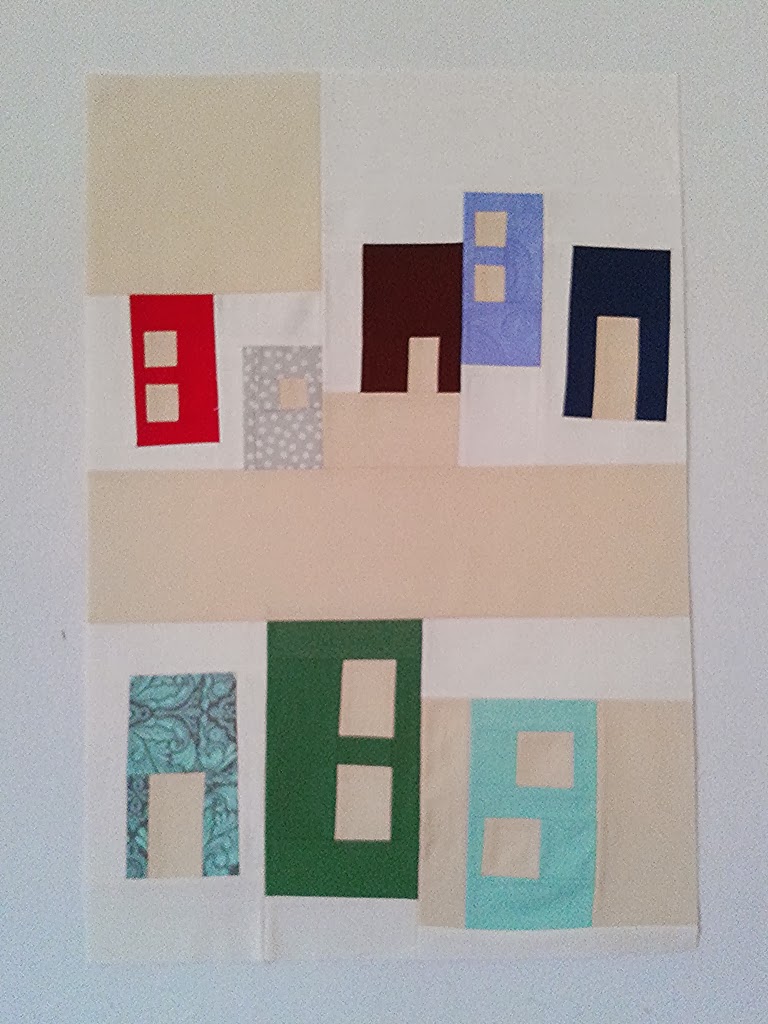
Lay your quilt down on the floor, notice I have NOT attached the binding yet:


Cut a 4 inch strip of fabric exactly the width of your quilt.  (use a wider strip for a bigger quilt, up to 8 inches) Piece the fabric if the quilt is longer than the width of fabric.


Turn the short ends of your strip under 1/4 inch and then again 1/4 inch and topstich creating clean ends.


 Repeat on both sides.


Press the strip in half lengthwise, creating a crease down the middle of the strip.


Open the strip and press both sides of the fabric lengthwise towards the middle crease you just created.


Now sew WRONG sides together with a 1/4 inch seam. Why wrong sides together? Once you insert a dowel to hang your quilt, you want the inside of the sleeve to be nice and smooth. if there is a seam allowance inside the sleeve, the dowel might catch, and that's not good! The seam allowance will be neatly hidden against the quilt back.


 Press open seam allowance. This is a bit tricky , if you want to preserve the creases you made earlier, so when you attach the sleeve to the quilt there's a little extra room for the dowel (see above), iron to the side, so you don't smush the creases (see below).


 Pin your sleeve centered at the top back of the quilt along crease with the seam allowance facing the quilt back :

 Attach your binding from the front, (if you are attaching your binding from the front, then folding back) I use the tutorial from Mary Fons at Quilty to attach my binding - there are three videos and they are awesome!

 Here is the quilt with the corner turned up so you can see the attached binding and how it interacts with the sleeve! Yay, you just saved yourself a whole row of blind-stitching!


 I turned my binding over, and zig-zag stitched it to secure (again, Mary Fons's tutorial - awesome!) and the sleeve is attached to the quilt quite neatly.  Here it is ready to have one row of blindstiching  attached to the bottom of the sleeve, using the crease as a guide:


 And here you can see the blind stitching (took half of an episode of Downton Abby to finish!) And the quilt is ready to hang!


I cut a 3/8 inch dowel to a scant width of my quilt, and balanced it on two nails  and once everything was straight, on went the quilt!


I suggest you use this technique only for quilts that are always going to be wall-hangings, as it is much easier to remove a sleeve that is hand-stitched on, if you change your mind with this technique, you would have to take off the binding!

Wednesday, January 8, 2014

When Peanut Butter Attacks

Living with two boys under the age of seven means that there's a lot of peanut butter floating around the house. One glob too much, it turns out! I set down my newly appliqued quilt block for the Penny Sampler on my innocent looking coffee table...and gasp! Peanut butter blob! You can see from the picture below that there was some staining. 


 I knew it was going to have to go for a dip in the washer, so I zig-zag stitched around the edges of the block to reduce fraying.  After consulting with my laundry expert (my husband, Aaron who does all the laundry - aren't I lucky?) We used Mostenbacker's Lift-Off for greasy stains (they have them for all kinds of stains, ask me how I know with two messy boys), cold water cycle, and flat dry. Voila!

 No more peanut butter! Phew! I was worried about shrinkage because I don't prewash, but the background fabric is Kona Eggshell and is pretty darn good quality.  I only lost a scant 1/16th of an inch on a 12.5 inch block, which I can hide in the seam allowance when the time comes to piece the quilt together. Crisis averted this time! Here are some of the other applique blocks for this project I've been working on which luckily avoided the peanut butter treatment:

Heart

Mitten

Clover